OAuth 2.0 Demystified: Swagger UI as a Client
In this post I will show you to configure Swagger-UI so that you can authenticate and authorize access to the secured endpoints in your API.
Is it possible to configure Swagger UI to act as a client application as defined in the OAuth 2.0 Authorization Framework?
Yes - it is possible! In this post I will show you to configure Swagger UI so that you can authenticate and authorize access to the secured endpoints in your API. If you're not using Swagger UI to document your APIs then you should really consider using it.
TL;DR Download and run the example application from the Straypaper GitHub Repository.
In the image below, you can see the layers of a typical API that is being described by the OpenAPI specification and visualized by Swagger UI.
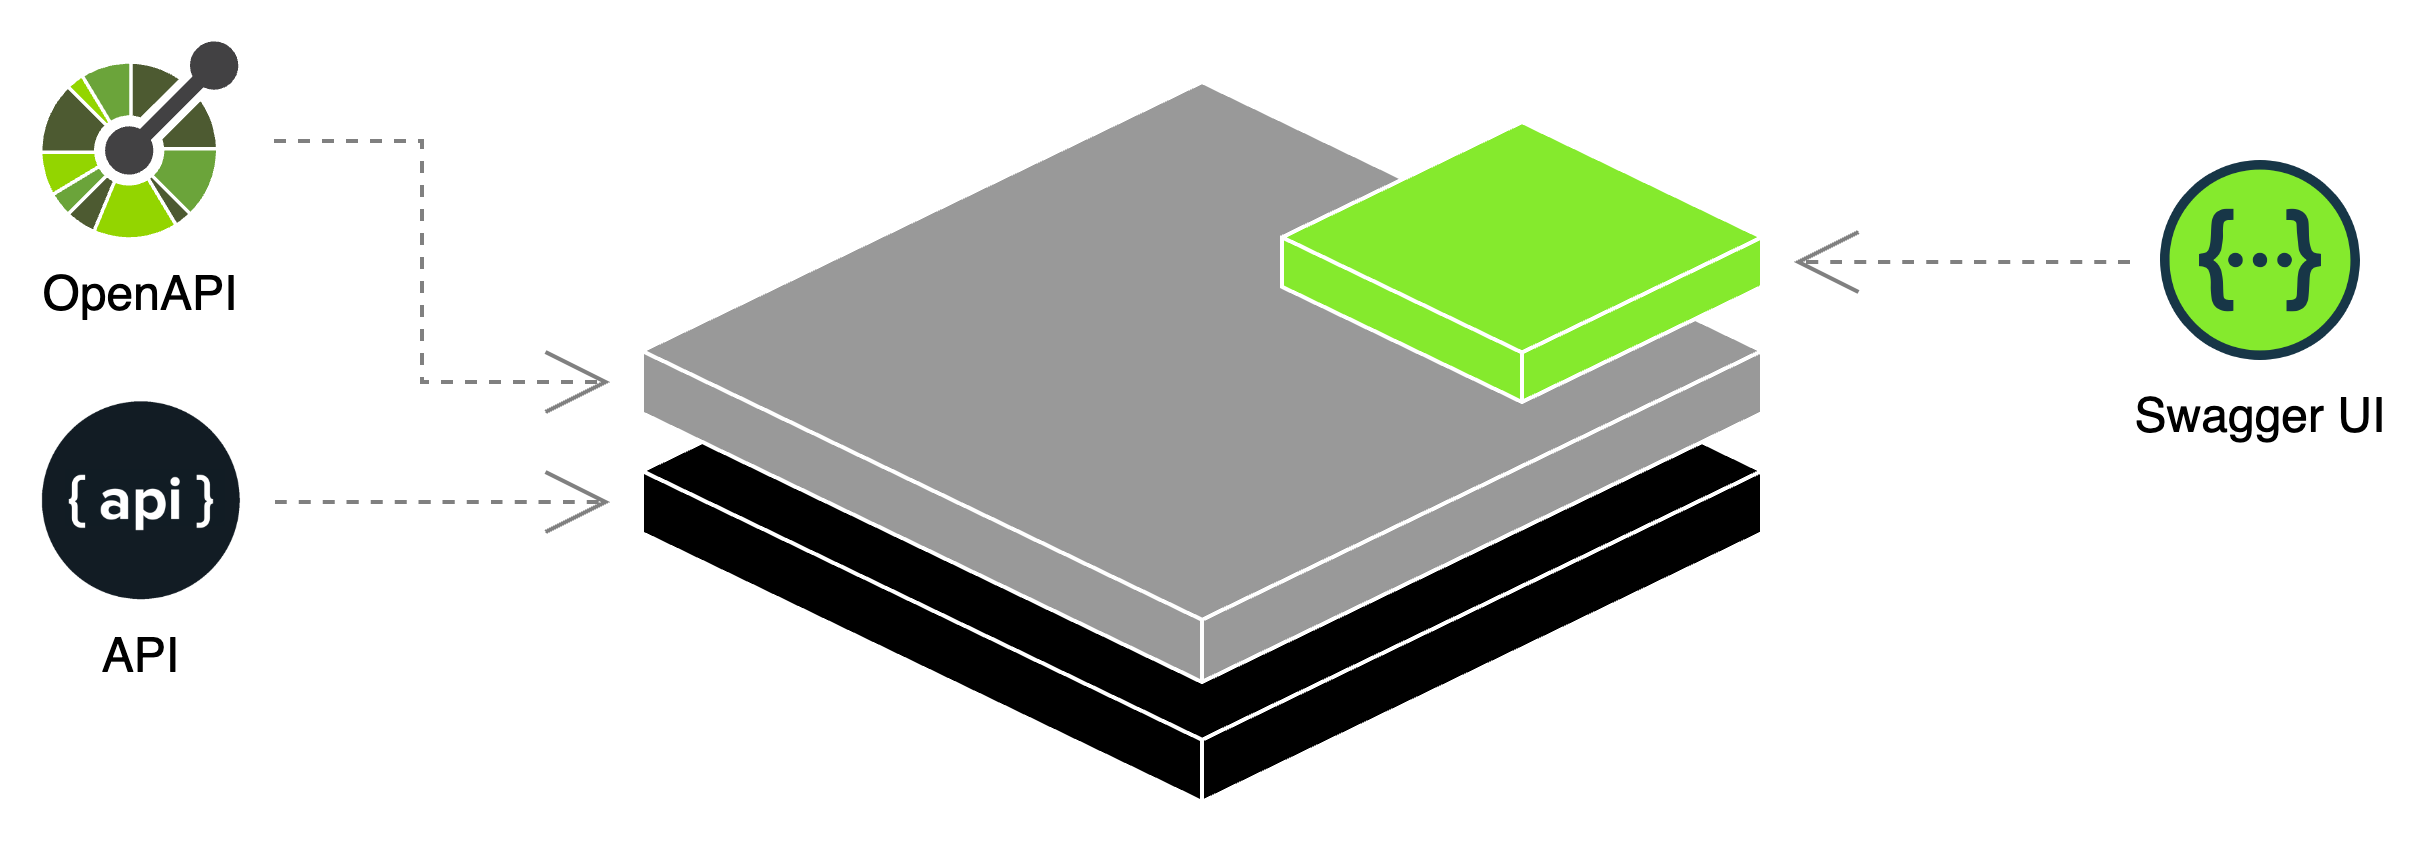
In this case, we can configure Swagger UI to act as an OAuth 2.0 client for our API. How do we configure Swagger UI to act as an OAuth 2.0 client?
Security Schemes
The first step is to create an OpenAPI Security Scheme object with an OAuth Flows object. What is a security scheme? An API can support multiple security types where each security type configuration is known as a security scheme. For example OAuth2, API key, etc. Each scheme is then registered by calling the AddSecurityDefinition method.
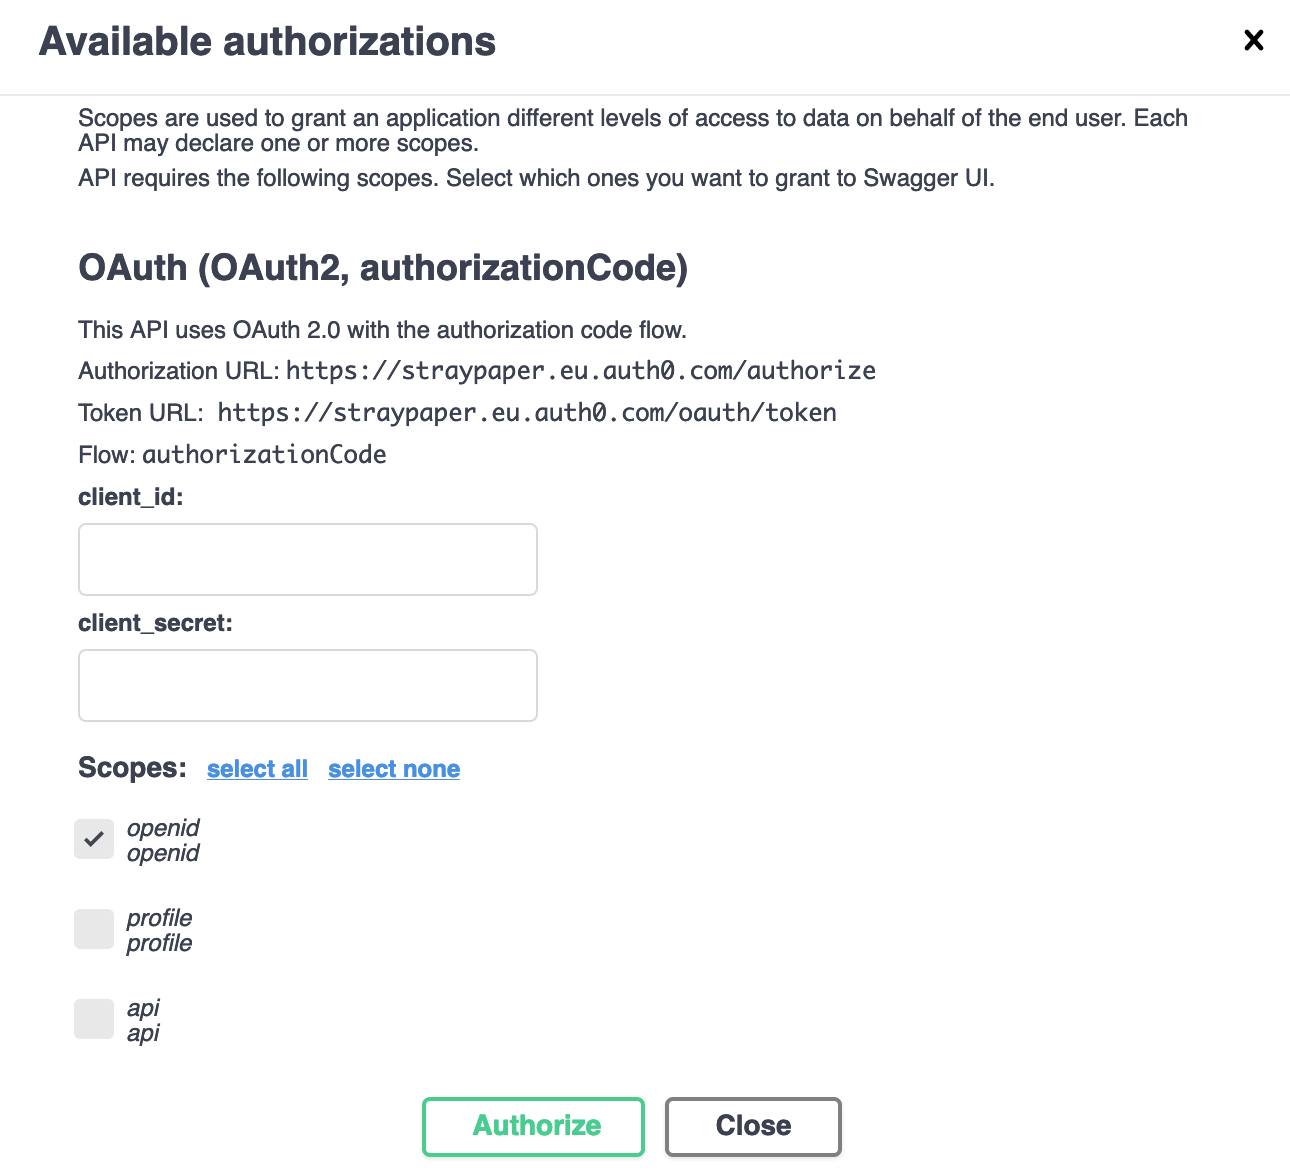
As part of the OAuth flow object we specify the available scopes for this security scheme. In the example below, which is an authorization code flow, we define openid, profile and api as available scopes for the access token request.
var scheme = new OpenApiSecurityScheme() {
    Name = "Authorization",
    Description = "Uses OAuth 2.0 authorization code flow.",
    Type = SecuritySchemeType.OAuth2,
    In = ParameterLocation.Header,
    Flows = new OpenApiOAuthFlows {
      AuthorizationCode = new OpenApiOAuthFlow {
        AuthorizationUrl = new Uri(
            "https://straypaper.eu.auth0.com/authorize"
        ),
        TokenUrl = new Uri(
            "https://straypaper.eu.auth0.com/oauth/token"
        ),
        Scopes = {
        {
          "openid",
          "openid"
        },
        {
          "profile",
          "profile"
        },
        {
          "api",
          "api"
        }
      }
    }
  }
};

options.AddSecurityDefinition("OAuth", scheme);
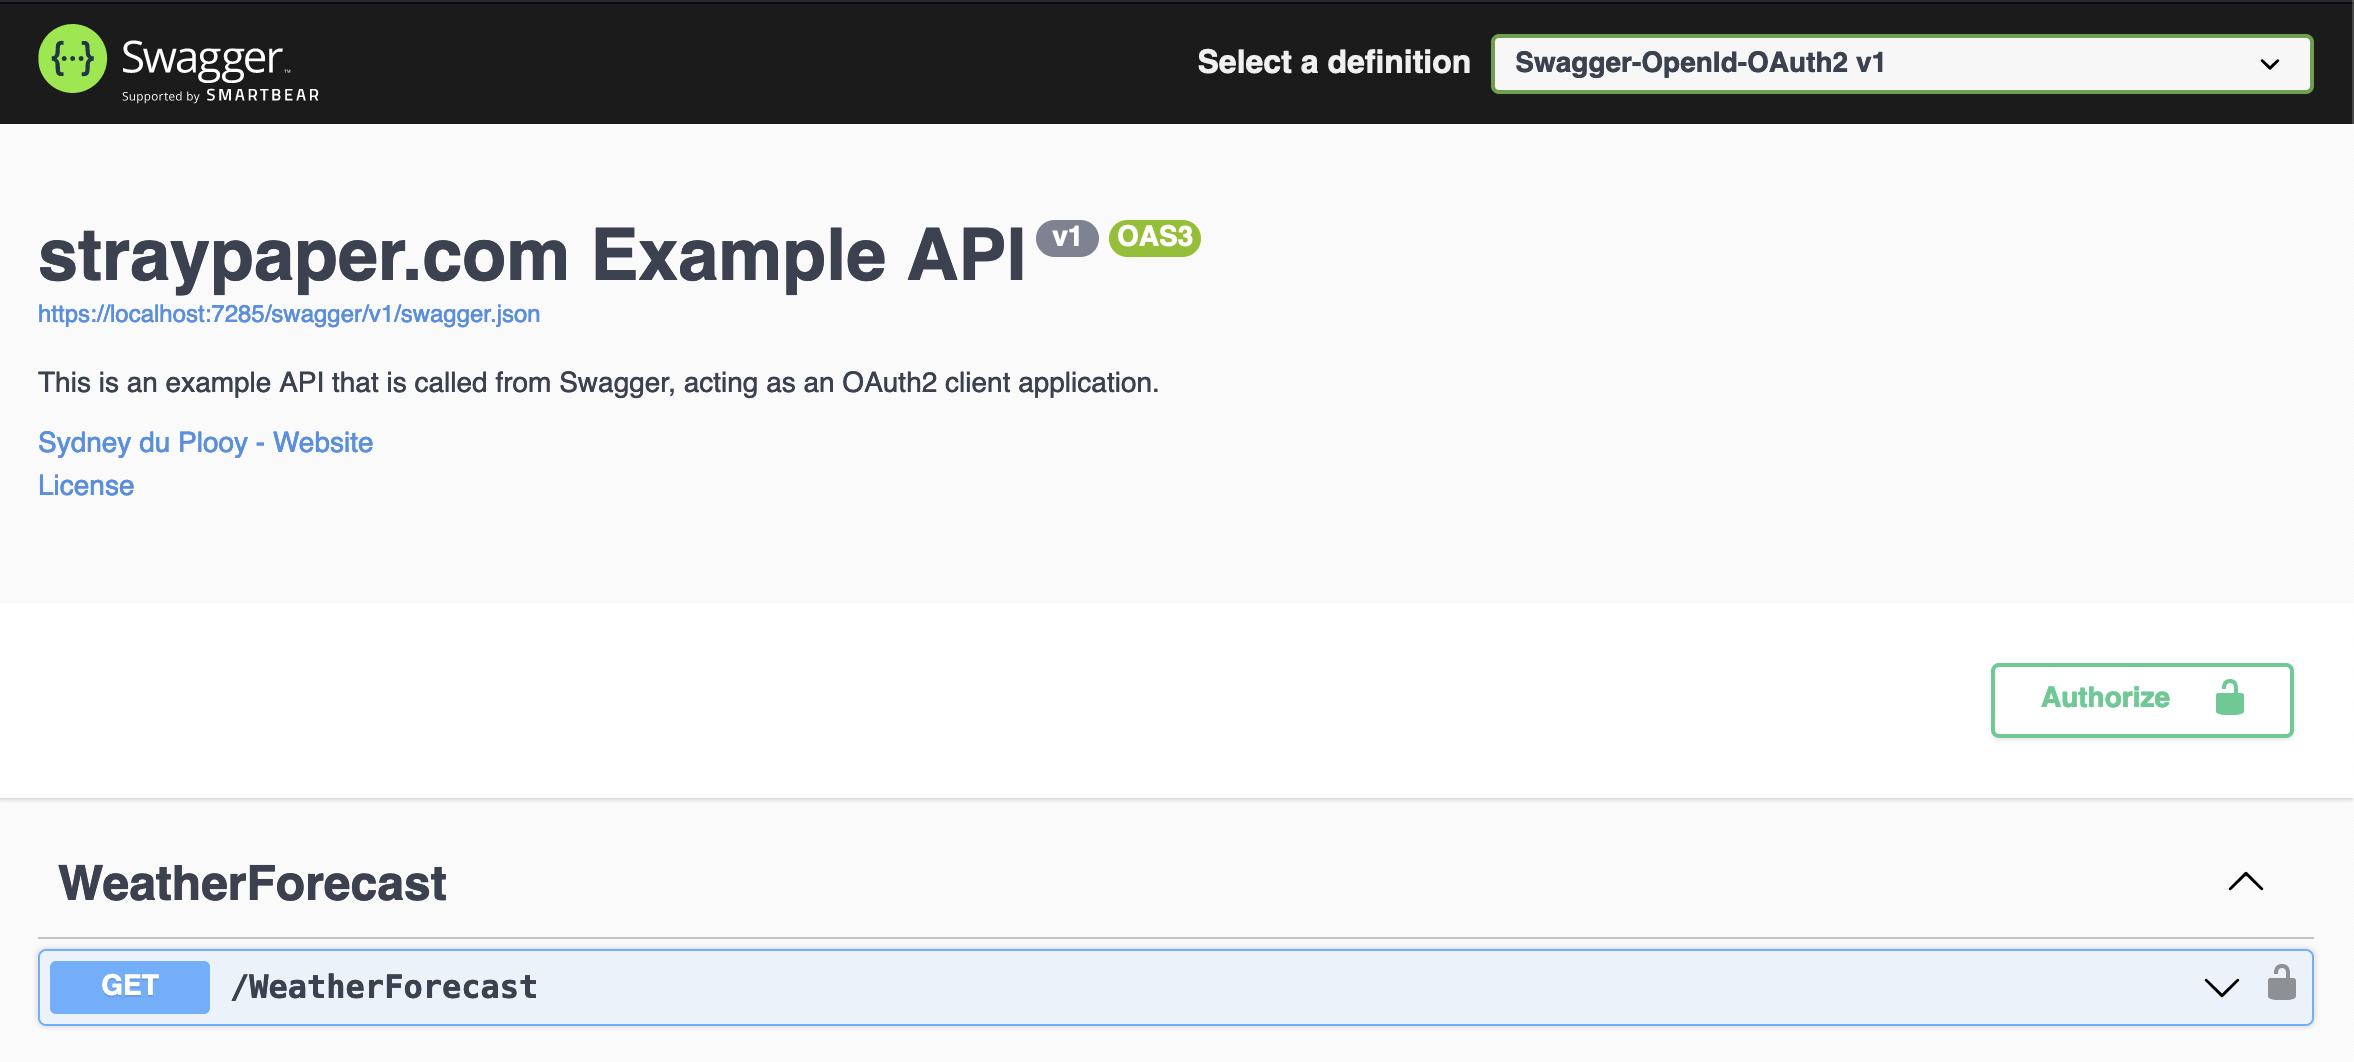
After the security scheme has been registered, you should see the Authorize button appear on Swagger UI.
Clicking on the Authorize button, will show the available authorizations of which OAuth2 should be shown with the authorization code flow.
Security Requirement
Next, we add the scheme as a security requirement as shown below. Note that this will apply to all the endpoints in the API. In certain cases, you may want to apply the security requirement only to a set of endpoints. This can be done but will require a custom operation filter to be created.
options.AddSecurityRequirement(new OpenApiSecurityRequirement
    {
        {
              new OpenApiSecurityScheme {
                    Reference = new OpenApiReference {
                          Id = "OAuth",
                          Type = ReferenceType.SecurityScheme
                    }
              },
              new List<string>()
        }
    }
);
In the example above, we add a security requirement using a reference object to the OAuth security scheme we registered earlier using the AddSecurityDefinition method.
In the meantime, we'll apply the authorize attribute to the controller as shown below.
[Authorize(AuthenticationSchemes = JwtBearerDefaults.AuthenticationScheme)]
API Authentication
Following the security requirements, we need to enable authentication for the actual API. In the example below, we add Bearer as the default authentication and challenge scheme.
builder.Services.AddAuthentication(options =>
{
      options.DefaultAuthenticateScheme =
          JwtBearerDefaults.AuthenticationScheme;
      options.DefaultChallengeScheme =
          JwtBearerDefaults.AuthenticationScheme;
}).AddJwtBearer(options =>
{
      options.Authority = "https://straypaper.eu.auth0.com/";
      options.Audience = "https://localhost:7285";

      options.TokenValidationParameters = new TokenValidationParameters
      {
            LogValidationExceptions = true,
            ValidateIssuerSigningKey = true,
            ValidIssuer = "https://straypaper.eu.auth0.com/",
      };
});
We then set the authority to the Authorization Server and the audience to the API. When the set the validation requirements for the API to ensure that the token is issued by the trusted authorization server.
Configure Swagger UI
Finally, it's time configure Swagger UI to act as an OAuth 2.0 client. In the example below, we add a default scope (which the UI will select automatically) called openid. We also tell Swagger UI to persist the authorization information between browser sessions. When it comes to Auth0, it's very important to specify the audience as part of the request. Failing to do so will return an invalid_token error message.
app.UseSwaggerUI(c => {
    c.OAuthScopes("openid");
    c.EnablePersistAuthorization();
    c.OAuthAdditionalQueryStringParams(new Dictionary<string, string> {
          { "audience", "https://localhost:7285" }
    });
});
A working example can be found in the Straypaper GitHub Repository.